Wednesday, December 23, 2015

The Original Pancake House: A Review


My husband came home from work one day, excited about a restaurant mentioned by a friend. He said we could go there for dinner and looked up their website to get an idea of the menu. That’s when we realized that it was a breakfast place; unlike I-Hop, The Original Pancake House operates for limited hours only: 7 AM-2 PM from Monday through Saturday and 7 AM-3 PM on Sundays.
We had completely forgotten about this place until last Sunday, when we suddenly decided to go there for a late lunch. Who would expect a breakfast place to be packed at 2.15 in the afternoon? Well, we were pleasantly shocked to see almost every table occupied.
Even though it is a breakfast/brunch restaurant, their menu has a Lunch/Dinner section with savory crepes.
We Ordered
Crepe with Chicken and Vegetables and a Side of Potato Pancakes
The potato pancakes were crispy and light and absolutely delicious. The crepe as is was slightly sweet but with the combination of the chicken, mushrooms, carrots, and a light sauce, it was sumptuous.
Pecan Waffles
Lovely, golden brown waffles that were crispy on the edges and soft as I cut into them. The highlight was the citrus flavored syrup that brought it all together.
Hot Chocolate
I love hot chocolate but have been disappointed many a time with concoctions that are either too diluted or too sweet. The hot chocolate here was, however, just perfect.  
Our Rating: 4 out of 5
We plan to keep going back to the restaurant to try the remaining items on their menu, so keep a look out for an updated review. 
Find The Original Pancake House near you and enjoy a hearty breakfast, brunch, or lunch, Bon appétit!


Saturday, November 21, 2015

Coconut Quinoa


I love coconut rice but since I am trying to avoid too much white rice, I came up with the alternate version with quinoa. I wasn’t very sure if the experiment would succeed, but now that I have tasted it I can vouch for the flavor. It was absolutely delicious and you will not miss the rice, for sure.
Ingredients
¼ cup Quinoa
¾ cup water or coconut milk
2-3 tbsps grated coconut
Salt to taste
For Seasoning
1 tsp Mustard seeds
½ tsp Urad dal
1 red chili
1 tsp oil
Few curry leaves
Method
Wash the quinoa and place in a saucepan along with coconut milk or water. You can also mix part coconut milk with water to make the liquid lighter. Cooking the quinoa in whole coconut milk make its more flavorful and creamy
Add salt to taste
Once the liquid starts boiling, reduce the heat, cover, and allow it to simmer until all the liquid is absorbed.
Fluff the cooked quinoa with a fork to separate the granules and keep aside
Heat oil in a pan, add the mustard seeds, urad dal, red chili, and curry leaves
Once the seeds splutter and the urad turns a slightly darker, add the grated coconut and turn off the heat
Mix well and add to the cooked quinoa
Mix well to incorporate and serve hot

For more quinoa recipes, check out Quinoa Salad with Yellow Squash, Quinoa Pulav, and Quinoa Laddoo. Bon Appètit.

Saturday, November 7, 2015

Paneer Masala Dosa


My husband and I occasionally watch a Malayalam cookery show called Super Chef that features a restaurant review hosted by a bubbly girl who loves food, a celebrity cookery segment featuring stars from daily soaps, and a segment called Food Salad where the host makes simple yet interesting dishes. Today’s paneer dish is actually an inspiration from one of the Food Salad segments and was called Fish In and Out. The recipe used plain white flour dough, filled it with a fish mixture flavored with spices, onions, and garlic, shaped it to look like a fish, and deep-fried it. I swapped the fish with paneer and the plain dough with puff pastry and baked it.
I enjoy making dishes that can be repurposed and if you are like me, you’ll love this paneer dish. It started off as a filling for paneer puffs and the left overs were spread onto crispy dosas for dinner a couple of days later.

Ingredients (Makes 4-5 dosas)
2 cups – Finely chopped paneer
1 cup – Diced onion
2 tsps – Ginger-garlic paste
1 tsp – Chili powder
½ tsp – Coriander (dhania) powder
¼ tsp – Turmeric powder
1-1  ½ tbsps. – Oil
1 tbsp – Lemon juice

Method
Heat a pan on medium heat
Add oil to the pan and wait till the oil is warm
Add the diced onions and the ginger-garlic paste
Sauté for about 2-3 minutes to remove the raw smell
Add chili powder, coriander powder, and turmeric powder
Sauté for 5-6 minutes or until the onions are tender
Add the finely diced paneer pieces
Mix well, cover, and cook for 10 minutes
Add lemon juice, mix again, and remove from the heat
(At this stage you can use the paneer masala to make puffs or stuffed parathas)

For Dosas
Heat your dosa griddle
Tip: Sprinkle some water on it to see if it is hot. If the water sizzles, then you are all set to make dosas
Grease the griddle with a couple of drops of oil
Take a ladle full of batter and spread it out in a circular motion, to make a thin, round crepe
Once it starts browning on the bottom, place about 2-3 tablespoons of the filling either in the middle or on one half of the dosa
Wait for the entire dosa to turn light brown, using a spatula release the edges, and fold over the filling
Serve hot with your favorite chutney (The dosas were so yummy that I gobbled them up without any accompaniments). Bon Appètit.
dosa with paneer masala flavored with onions and spices
 

Friday, August 28, 2015

Dates Pradhaman and a Delectable Onam


Make this delectable dates jaggery pradhaman for Onam or any special occasion
Let me start by wishing all of you a very Happy Onam. For the past few years, we have made it a tradition to either call friends over for Onam or at least distribute payasam. I was looking for a new payasam to try this year and coincidentally saw part of this recipe on a Malayalam channel.
Even though it was an experiment, I was quite sure that it would turn out delicious (not bragging about my cooking skills…its truly that simple to make).
Ingredients
Pitted dates – 2 ½ cups (approx.)
Melted jaggery – 1 – 1 ½ cups (to taste)
Ghee/Clarified butter – 1 tbsp
Coconut milk – 5 cups
Water for soaking the dates and melting the jaggery
For Garnish
Chopped dates – ¼ cup
Cashew nut (chopped) – ¼ cup
Ghee/Clarified butter – 1 tbsp
Method
It is recommended to use a heavy bottomed vessel, like a cooker, for making this or any payasam. 
Chop the dates and make a paste (you could soak the dates in a little water for about 15-20 minutes for easier grinding). Keep aside.
Place a saucepan/vessel on medium heat. Add jaggery and about a ¼ cup of water and allow it to melt. Leave it on the lowest heat setting, while you start working on the dates.
Place the cooker on low heat and add 1-tablespoon ghee. Add the dates paste and allow it to cook for about 10-12 minutes, while stirring every 2 minutes or so.
Add half of the melted jaggery to the dates and stir well.
Allow it to cook for about 5 minutes. Taste and add more jaggery, if required.
Once the dates and jaggery mixture starts coming together, reduce the heat and add the coconut milk. (I used the ready-made variety that comes in a can. If using fresh milk, add the third/most diluted extract first, cook for about 10 minutes, add the second extract, and cook for another 5-10 minutes. Finally, add the first or the thickest milk and take it off the heat).
With the ready-made milk, you can allow the mixture to simmer for about 10 minutes after adding the milk and then remove it from the stove.
Heat a small pan, add 1-tablespoon ghee, and sauté the cashew nuts until they turn light brown. Turn off the heat and add the chopped dates. Mix well and garnish the dates pradhaman.
Serve warm or cold to suit your taste. 

For more Onam recipes, visit Onam Special and Onam and an Exciting Start to a Long Weekend.
Wishing you all a Very Happy and Delectable Onam!

Sunday, August 16, 2015

Carrot-Papaya Salad

Has the summer sun been beating down on you fiercely? It has been quite hot in my neck of the woods and when the heat goes up, it is best to indulge in cold, refreshing foods. Be it thirst-quenching drinks, delectable ice creams, cold soups, or crunchy salads, go forth and enjoy.

I try to incorporate salads into my diet (occasionally) and have found that summers are best for experimenting with salads, because they can be refreshing and satisfying at the same time. So here is my interpretation of a popular salad found mostly in Thai restaurants: the crunchy and delicious carrot and papaya salad.

Ingredients (Serves 1-2)
Grated carrot – 1 cup
Grated raw papaya – 1 cup
Finely chopped green chili – 1 tsp
For Dressing
Lime juice – 1 tbsp or to taste
Grated ginger – 1 tsp
Honey – 1 tsp or to taste
Salt to taste
Garnish
Crushed roasted peanuts – 2 tbsps or more
Method
Mix together all the ingredients listed under Salad Dressing.  
Add the grated vegetables and green chilies to a bowl
Add the dressing and toss well.
Refrigerate the salad for 15-20 minutes or longer before serving as it taste best when cold.
Add the crushed peanuts just before serving. Please note that you can always place the crushed peanuts on the side, when serving people with food allergies. 
Enjoy this crunchy and refreshing salad as a side salad or even as a main course; you'll not be disappointed!


Note:
A garnish of cilantro would be ideal.

Wednesday, August 5, 2015

Quinoa Pulav


Quinoa is a comparatively recent entrant into my kitchen and I am still trying to find interesting ways to cook it. Apart from using it as a substitute for white rice, I tried making batter in combination with oats and urad dal. The idlys were a bit sticky, but the dosas turned out okay (lesson learned: I need to keep working on the proportions). One of the successful experiments was this delicious laddoo, which you should try.
I am not sure how popular quinoa is in India, but an uncle of mine mentioned that his friend is cultivating it somewhere near Mysore. One thing I am sure of though, it is a priced commodity at Rs. 600/Kg.
Ingredients (Serves 2)
½ cup – Uncooked quinoa
1.25 cups – Water
¼ cup – Thinly sliced onion
¼ cup – Corn kernels (fresh or frozen)
¼ cup  - Green peas (fresh or frozen)
1-2 pods – Cardamom
1, 1” piece – Cinnamon
1 – Bay leaf
1 small piece – Star anise
1 tsp – Oil
Salt to taste
Method
Rinse the quinoa and place in a saucepan with water and salt.
Bring it to a boil, reduce the heat to medium, cover, and allow it to simmer for about 10 minutes.
Check to see if any water remains. If there is, allow it to simmer for a few more minutes.
Once all the water has been absorbed, turn off the heat, fluff the quinoa with a spoon or fork, cover, and keep aside.
Heat oil in a pan and add all the spices.
Place on medium heat and sauté for a minute.
Add the sliced onions.
Sauté until the onions become tender and slightly brown.
Add the corn and peas and sauté for 2-3 minutes or until soft.
Add the cooked quinoa and more salt if required.
Mix well, cover, reduce the heat to the lowest possible setting, and leave it for 5-6 minutes.
Serve hot with raita or plain curd, papad, and your favorite pickle.
Aromatic spices and delectable vegetables make this pulav amazing
Quinoa Pulav with Aromatic Spices and DelectableVegetables


Note:
Most quinoa recipes call for using double the amount of water. I have found that using a little extra adds to the texture. Too much water can be harmful too as you’ll end up with a mushy mess. It could be different for different types, so please start with double and experiment your way through larger amounts.

Saturday, April 4, 2015

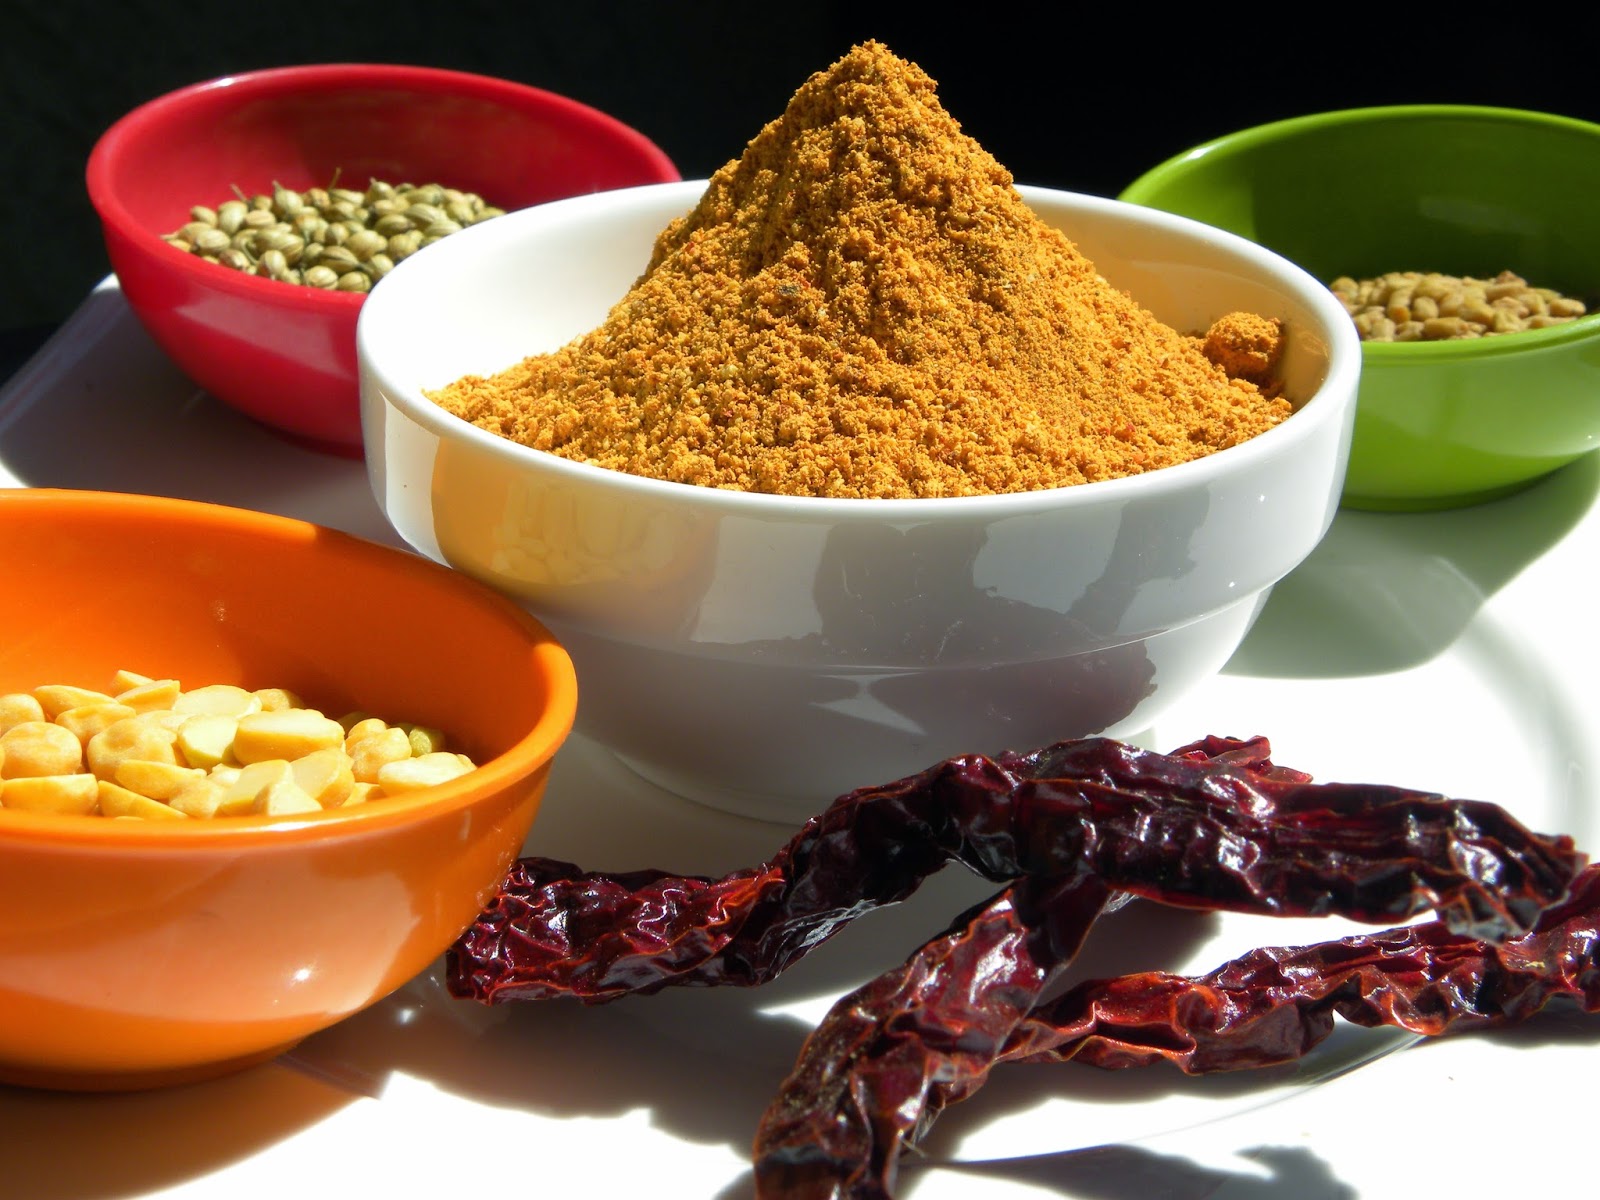
DIY Sambar Podi (Powder)


Sambar, for those unfamiliar with the term is a South Indian dish made with vegetables and lentils, flavored with tamarind extract and spice powders. It is one of the most popular dishes served as an accompaniment for rice, dosa, idly, and more. Special occasions like weddings and birthdays are quite incomplete without this delicacy. But the thing about sambar is that almost every household has their own recipe for it. Some use a powder, some don’t, some use coconut while some swear against it…you get the drift, right?  

I used to rely on a store bought powder too until a few years ago, when our former neighbor in Chennai offered to make some for us. Aunty came over and demonstrated the process and I jotted down the approximate measurements and steps. She made enough to last me for quite a long time, so I did not bother to try making my own. Finally, when the stocks started dwindling, I decided to give it a try…and the rest is sambar history.

Ingredients (to make about 1 cup)

1 tsp - Fenugreek seeds (methi)

3 tbsps - Split Bengal gram (chana dal

1 tbsp - Coriander seeds (dhania)

6-10 (depending on taste) - Dried red chilies, preferably the round variety

Method

Heat a small pan, on medium heat, and add the fenugreek seeds. Toast until they turn slightly darker and start spluttering. Remove onto a plate.

Add the split Bengal gram to the same pan and sauté for 2-3 minutes, or until the dal turns a shade darker. Add to the plate.

Sauté the dhania for 2 minutes or until they become crunchy (try pressing them with a spatula and they should crack easily). Remove onto the plate.

Finally, add the red chilies and sauté for 2 minutes or until they give out an aroma.

Now you have all your ingredients roasted and ready to powder.

Allow them to cool a bit, place in a blender/mixie, and make a fine powder. Store in an airtight container to maintain the freshness. You can even put it in the refrigerator, if you will not be using it too often.

I don’t have exact measurements for the lentils/tamarind/and other ingredients that go into the sambar, but I’ll definitely add a sambar recipe soon. Until then, for those who already know how to use the podi, go ahead and try this one. I am sure you’ll not go back to store bought ones again. Bon Appètit.

Note: I have used long red chilies in this batch and they work fine too. You can always use lesser chilies in the powder and compensate by using chili powder when making the actual sambar.  
Make your own sambar powder in a jiffy and enjoy delicious sambar with your family

Friday, January 16, 2015

Milagu-Kariveppilai Kuzhambu (Pepper-Curry Leaves Curry)


During our July 4th Weekend and Catching Up With Friends episode, Gomathi had brought this thick, delicious kuzhambu with strong flavors of pepper, curry leaves, and tamarind. We loved the curry and almost licked our plates clean. I have called it a curry for lack of a better word. It can be made slightly runny to be mixed with rice or made thick like a chutney.
When I tried it for the first time, my husband took one taste and asked, "Isn't this the kuzhambu Gomathi had made?" Yaay, I had got it right!" Here's the recipe for all of you to try.
Ingredients
2 tbsps - Urad dal
2 tbsps - Toor dal
1-2 tbsps - Whole peppercorns
2-3 Red chilis
1 cup (loosely packed) - Curry leave
1/4 cup + more to taste - Tamarind extract
1/2-3/4 cup - Water
2 tbsps - Gingelly oil
Salt to taste
For Seasoning
1 1/2 tsps - Mustard seeds
1 - Red chili
Method
Soak the tamarind in hot water for about 10-15 minutes. Squeeze out the pulp and keep aside.
Dry roast the red chilis, dals, and pepper until the dals turn a shade darker and the pepper splutters a bit. Allow it to cool.
Grind together the roasted mixture, curry leaves, and salt to make a thick paste.
Heat the gingelly oil in a deep pan or vessel. Once the oil is hot, add the mustard seeds and the red chili and wait till the seeds stop spluttering.
Add the ground mixture and some water, reduce the heat, and allow it to simmer and thicken. Add more water if you want it to be in a semi-gravy consistency.
If not, allow the mixture to thicken more and remove from the heat. Serve hot with plain rice. You could have this as a side dish or mixed with hot rice and some gingelly oil or ghee. Either way, this flavorful kuzhambu will be a sure hit in your home. Bon Appètit.

Enjoy this spicy and aromatic curry/chutney with rice and a spoonfull of gingelly oil or ghee


Favourites